> ## Documentation Index
> Fetch the complete documentation index at: https://docs.databar.ai/llms.txt
> Use this file to discover all available pages before exploring further.
# Custom Http APIs
> Add your own REST APIs to Databar for custom enrichments and exports.
Databar's enrichment library covers 160+ integrations, but sometimes you need one that isn't available yet. Custom APIs let you connect any REST endpoint (whether it's a public API, an internal service, or your own CRM) and use it directly inside Databar tables.
## Why add custom APIs
Custom APIs are useful when:
* **The integration you need isn't in Databar's library**: connect any public REST API yourself instead of waiting for official support.
* **You have internal or private APIs**: pull data from internal services that aren't publicly available.
* **You want to connect to your CRM or internal systems**: push enriched data directly to the tools your team already uses.
* **You need custom exporters**: send table data to any endpoint that accepts HTTP requests.
## Two types of custom APIs
Databar supports two categories of custom connectors:
| Type | Direction | Where it appears |
| --------------------- | ------------- | --------------------------------------------------------------- |
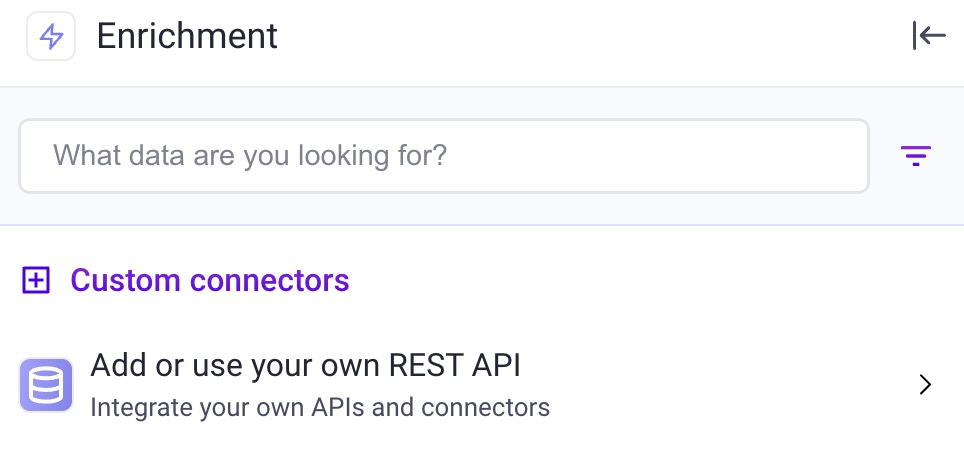
| **Custom enrichment** | Pull data in | Under "Add or use your own REST API" in the **Enrich** sidebar |
| **Custom exporter** | Push data out | Under "Send this data to a custom API" in the **Share** sidebar |
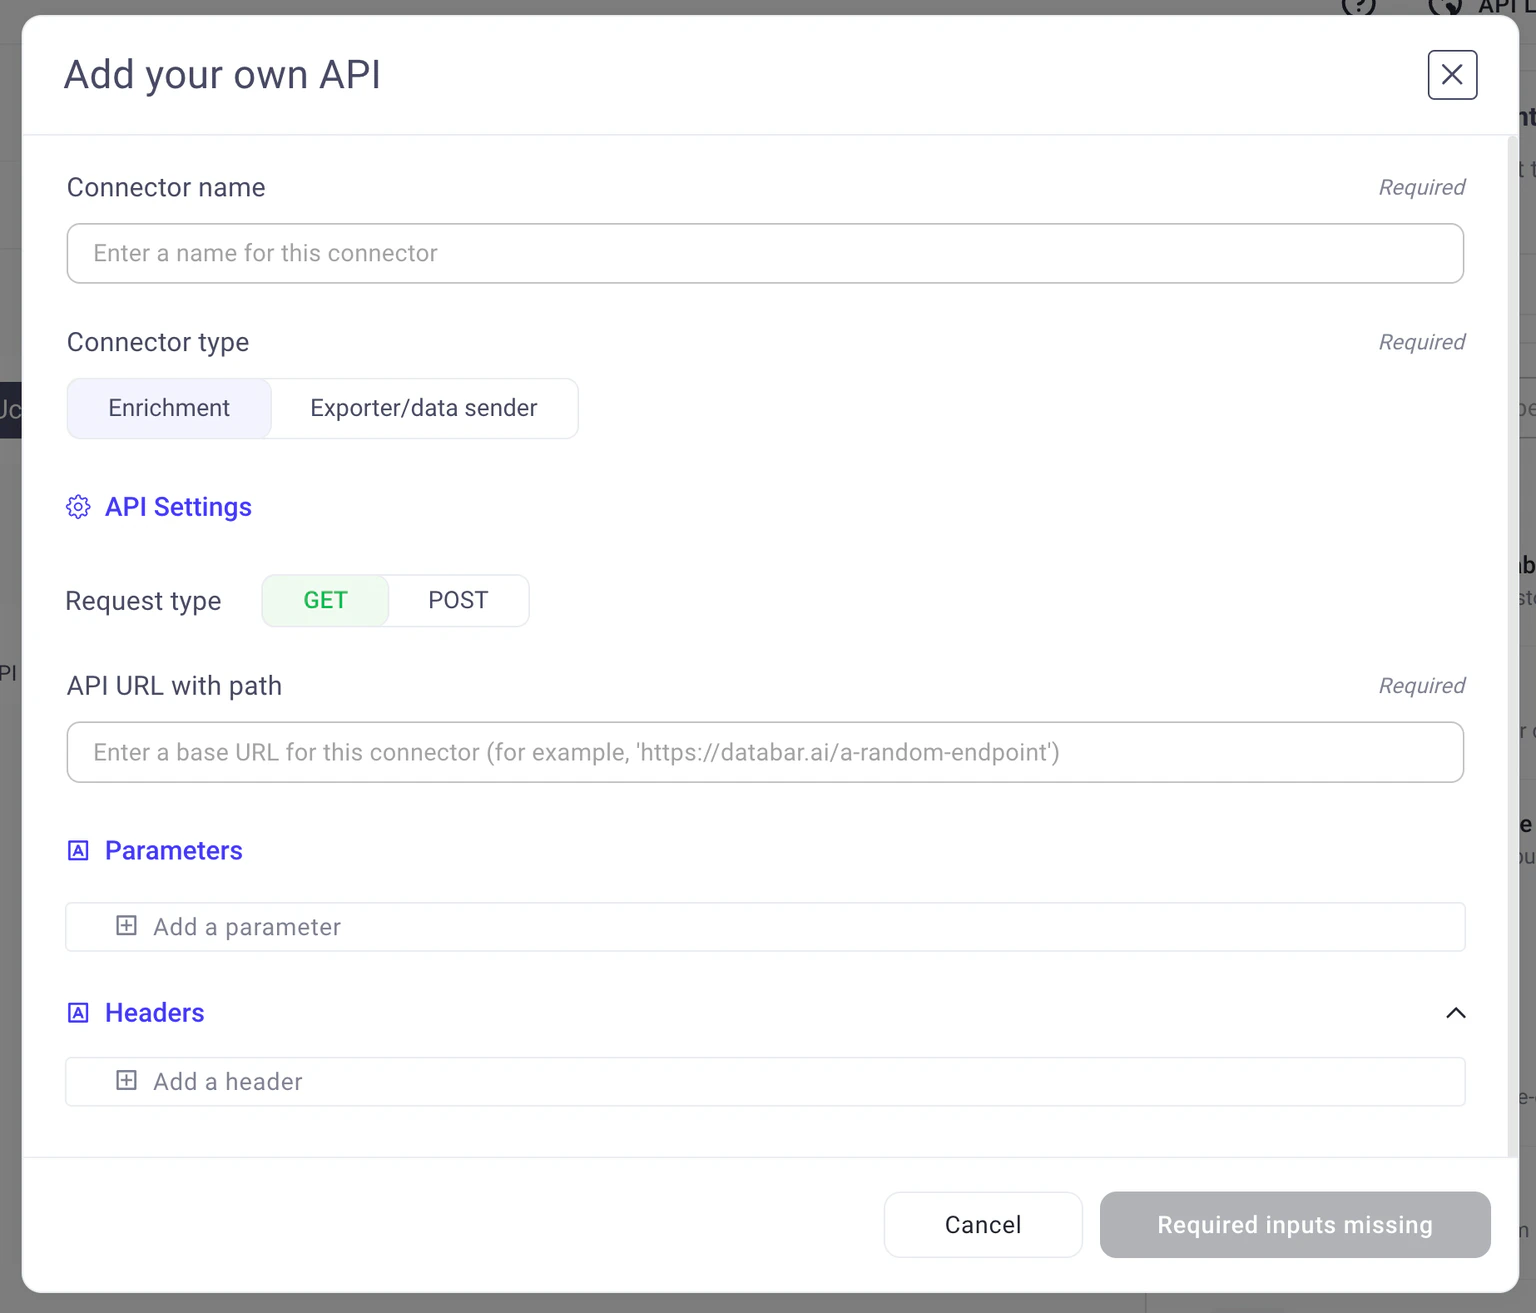
## How to add a custom API
Go to your workspace home and click **Integrations**.
Click **Connect a custom API**.
Enter the endpoint URL, select the HTTP method, configure authentication, and define request parameters.
Click **Save**. Your custom API is now available in the enrichment or exporter catalog depending on how you configured it.
For custom enrichments, you'll find it under **Add or use your own REST API** in the Enrich sidebar.
Add the custom API to a table just like any other enrichment or exporter. Map your table columns to the API's request parameters.
Click **Add Columns** (for enrichments) or configure your export, then hit **Run**.
## Supported HTTP methods
Custom APIs support the following HTTP methods:
* **GET**: retrieve data from the endpoint
* **POST**: send data in the request body
* **PATCH**: partially update a resource
* **PUT**: replace a resource entirely
## Advanced settings
### Override content-type parameters
You can override API-specific text, like content-types, by simply adding them as a parameter. For example, if you want to override the `Content-Type` parameter and send:
```json theme={null}
"Content-Type": "application/x-www-form-urlencoded"
```
Then simply add it as a parameter and Databar will override the value that is sent by default.
### Custom body templates
For APIs that require a specific request body structure, click **Use a custom template** under Body parameters. Use dollar signs around parameter names to insert dynamic values from your table columns:
```json theme={null}
{
"contact": {
"email": "$email$",
"name": "$full_name$"
}
}
```
When the enrichment runs, `$email$` and `$full_name$` are replaced with the corresponding column values for each row.
### Rate limit and concurrency controls
Rate limit and concurrency controls are available on Scale+ plans.
Configure the maximum number of requests per second and the number of simultaneous requests for your custom APIs. This lets you fine-tune performance for high-volume runs while staying within the provider's rate limits.
## Plan availability
Custom API access depends on your Databar plan. Check your [workspace settings](/product-guide/workspace-settings) or visit [databar.ai/pricing](https://databar.ai/pricing) for details.
## Next steps
Learn how authentication works for data providers.
See how enrichments work with your tables.
Understand how custom API usage is billed.