

 MCP Server
- Import your HubSpot contacts and companies into a Databar table: everything, or a filtered slice.
- Enrich them with verified work emails, phone numbers, firmographics, tech stack, funding data and more.
- Look up the HubSpot deals linked to your companies and contacts, so you can see who is already in your pipeline.
- Write the enriched data back to HubSpot, updating existing records or creating new ones.
Before you start
- A Databar account. Sign up at databar.ai. Every workspace starts with a 14-day free trial and no credit card required. Paid plans start at $99/month.
- A HubSpot account with permission to connect apps. If your HubSpot account uses app approval controls, a HubSpot Super Admin may need to approve Databar first (see Troubleshooting).
1. Install and connect HubSpot
1
Open the HubSpot integration
Log in to Databar and click Start a new project. Under Suggested for you, select HubSpot.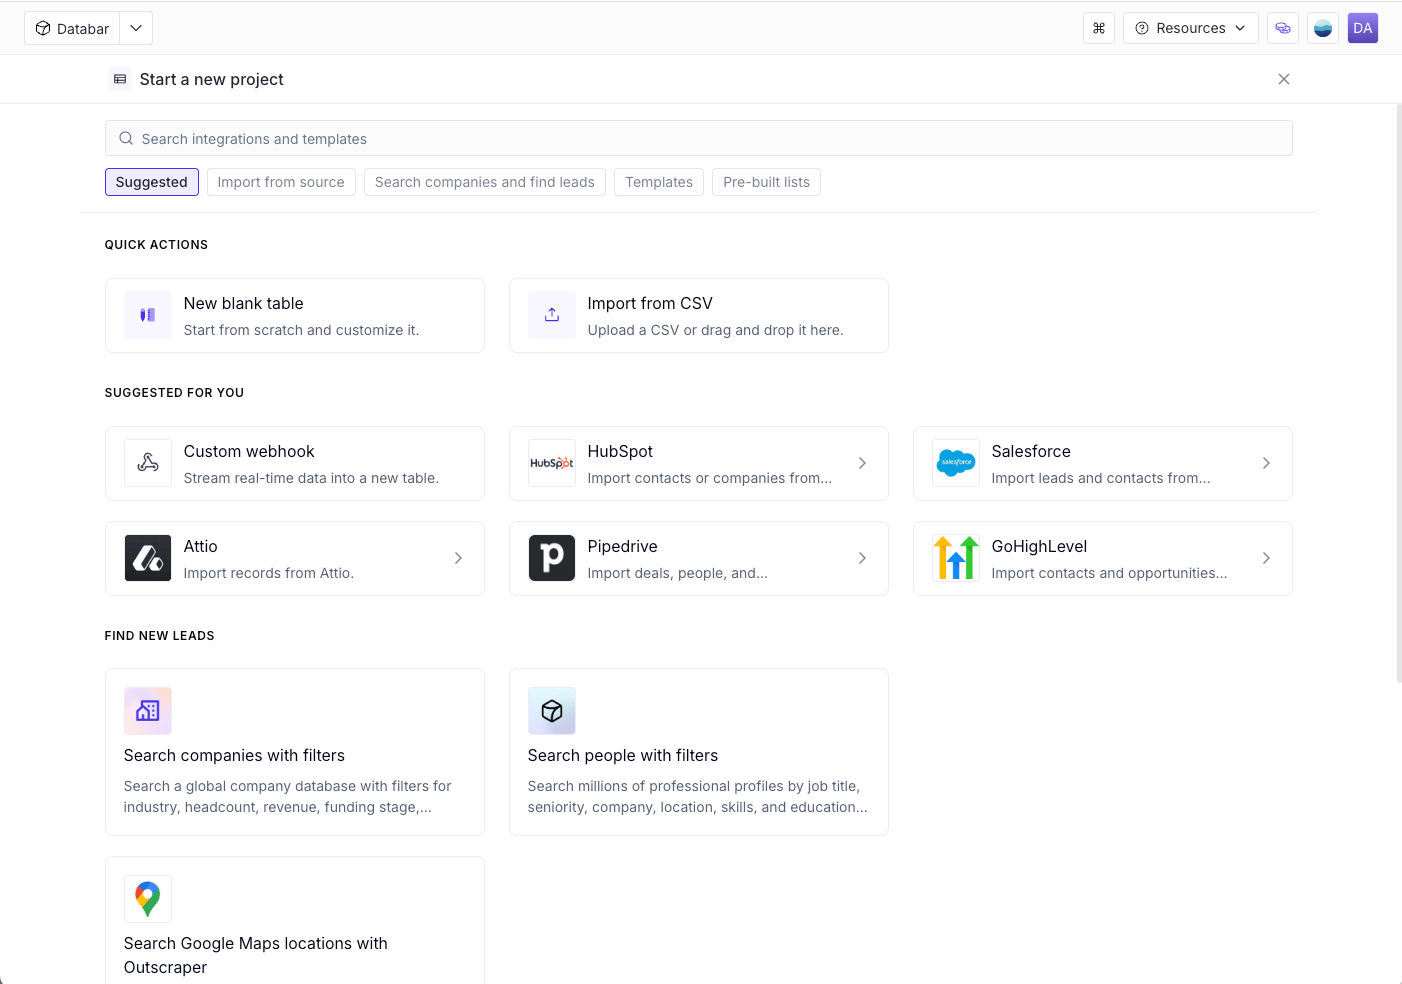
2
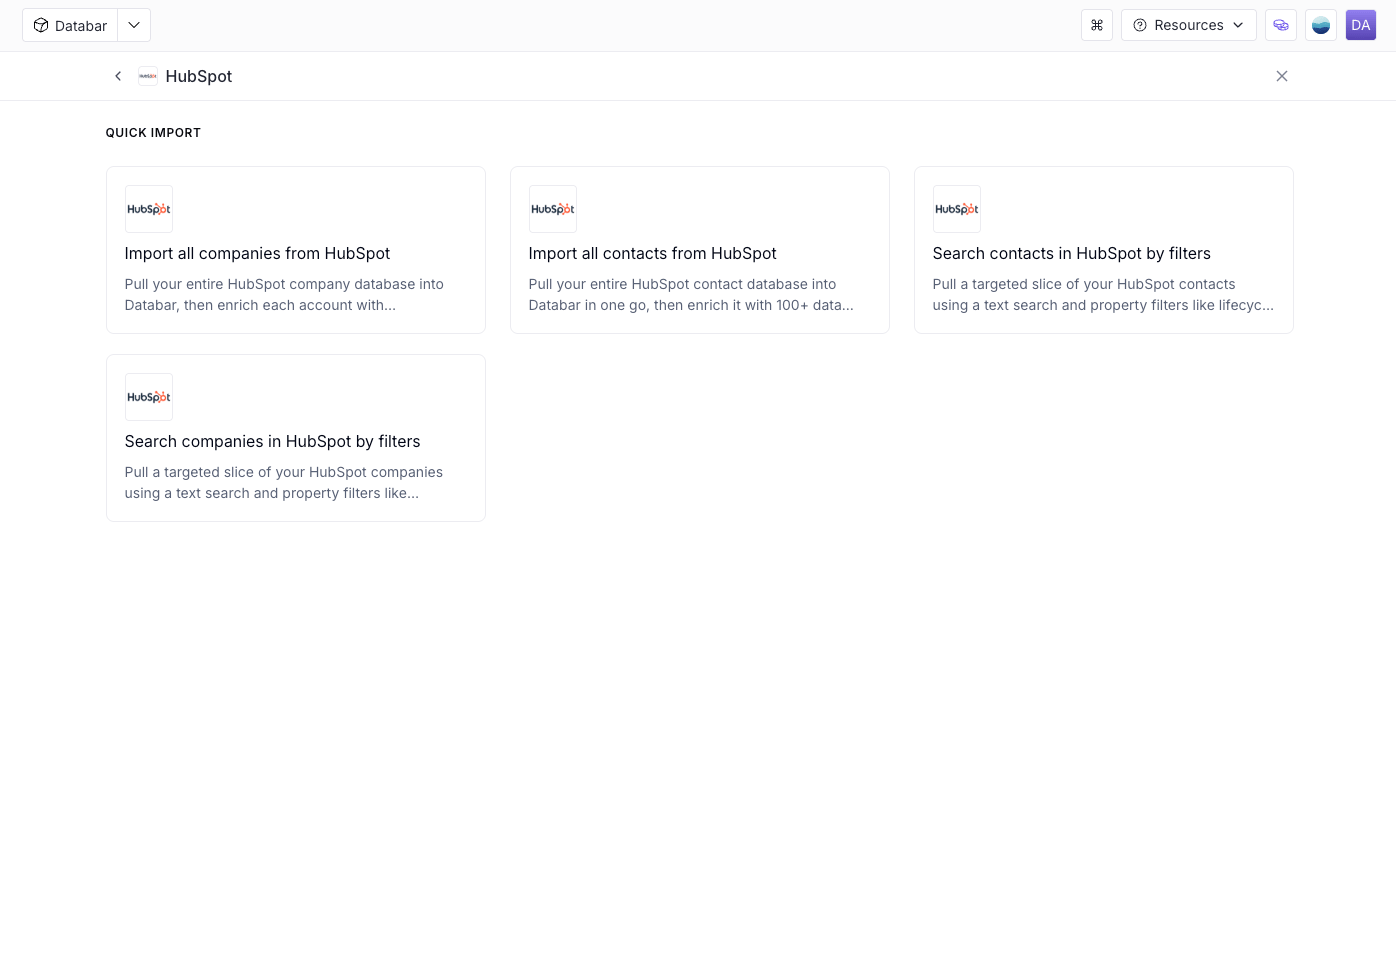
Choose how to bring in your data
- Import all companies from HubSpot: your full company database.
- Import all contacts from HubSpot: your full contact database.
- Search contacts in HubSpot by filters: a targeted slice of contacts, using a text search and property filters such as lifecycle stage or job title.
- Search companies in HubSpot by filters: a targeted slice of companies, using filters such as industry, country or employee count.
3
Authorize your HubSpot account
In the left panel, under Authorization, click Click to Authorize account. A HubSpot window opens.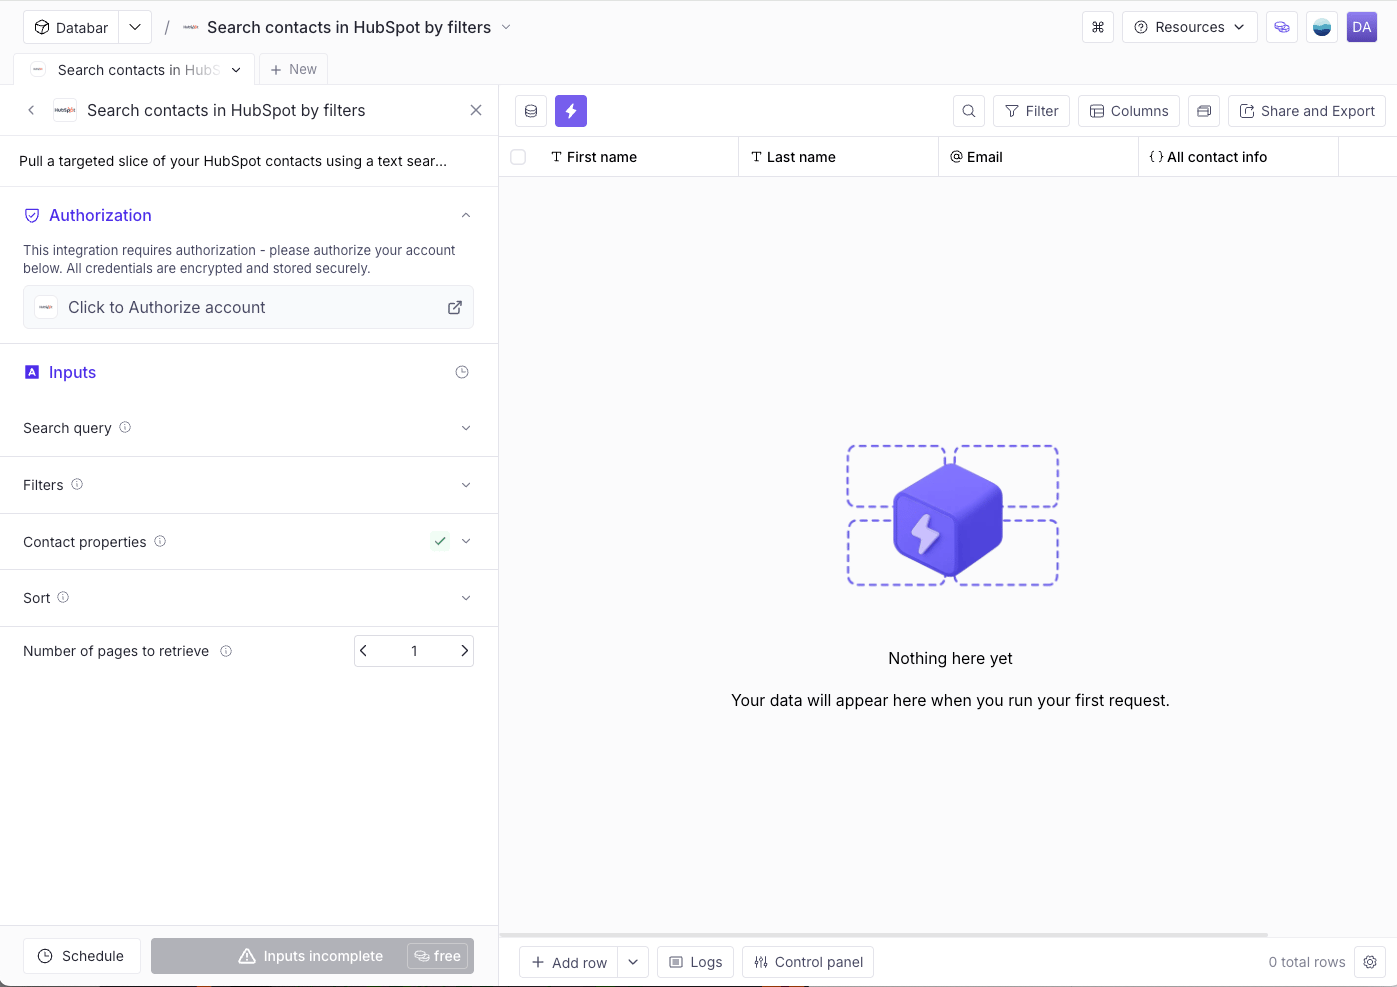
4
Select your account
Select the HubSpot account you want to connect, then click Choose Account.
5
Approve the permissions
Review the permissions Databar requests (see Permissions Databar requests), then click Connect app.
6
You're connected
You’re sent back to Databar, and the Authorization panel shows Authorized on HubSpot. You only need to connect once per workspace. Every HubSpot import and export in the workspace uses this connection.
Permissions Databar requests
On HubSpot’s consent screen, Databar requests these permissions. We use each one only for the purpose listed, and only when you run an import or export yourself.
HubSpot also adds its standard
oauth permission to every connected app.
The deals permission is optional. If you don’t grant it, everything else works as normal; only the deals lookup is unavailable. If you connected HubSpot before this permission was added, reconnect to use the deals lookup.
Databar does not access HubSpot in the background. It only reads or writes data when you run an import, enrichment or export you’ve set up, or on a schedule you’ve created.
2. Import your records
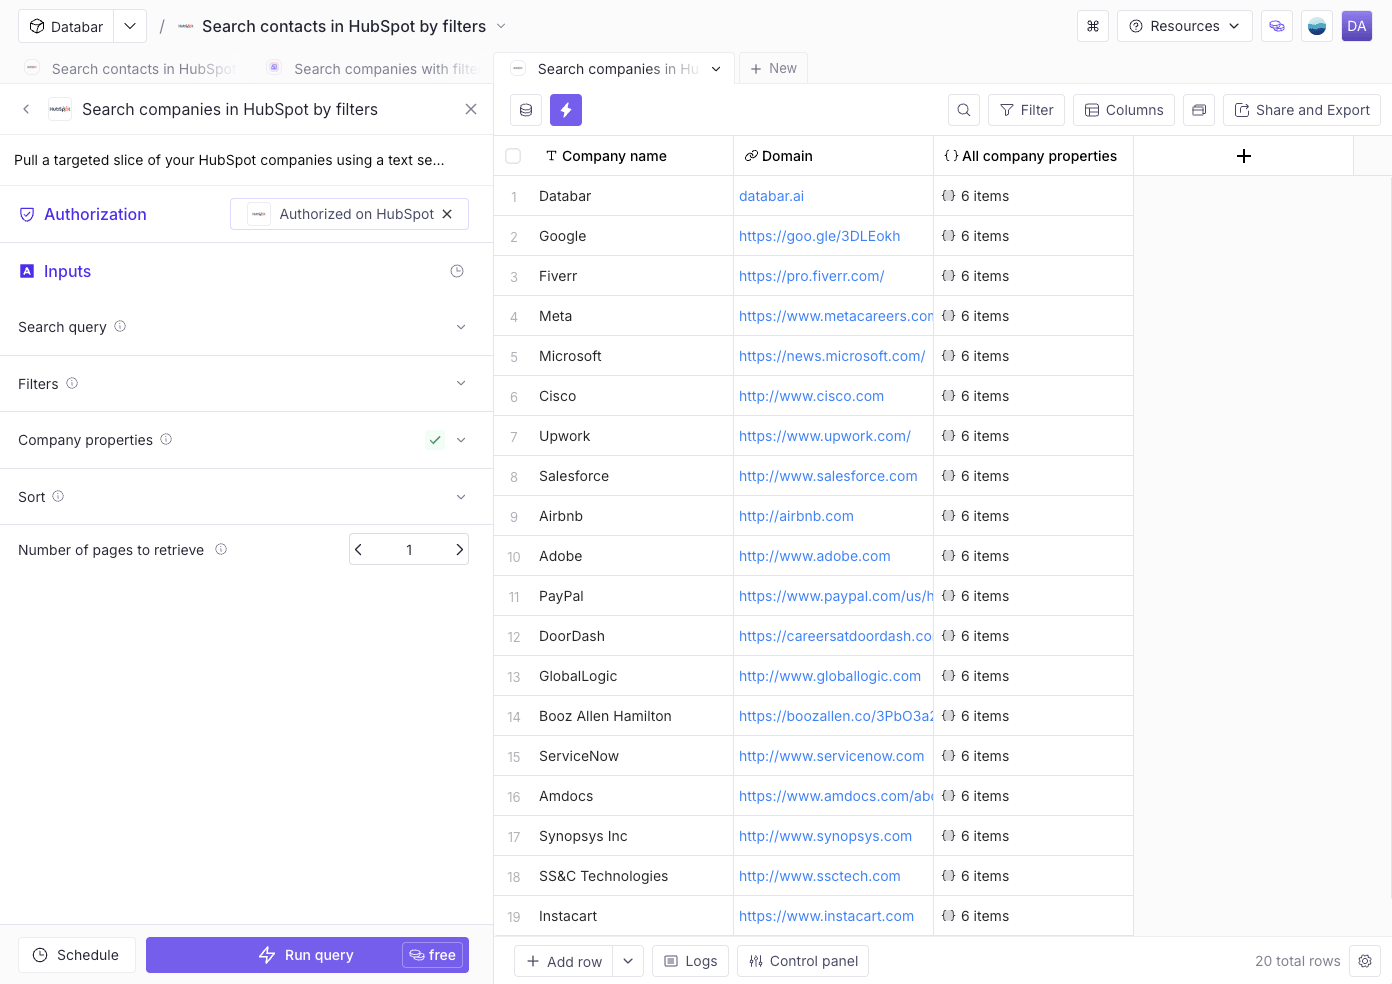
- Under Inputs, set up what to import. For the search options you can add a Search query, Filters, which Contact properties or Company properties to bring in, and a Sort order. Set Number of pages to retrieve to control how many records come in.
-
Click Run query. Your records appear in the table, with the properties you selected as columns.
- Optional: click Schedule to re-run the import automatically and keep the table in sync with HubSpot.
3. Enrich your records
- Click + at the end of the column headers to add an enrichment column.
- Search for what you need, for example a work email, phone number, company headcount, tech stack or funding data. Use a waterfall to try several providers in turn until one returns a result.
- Map the enrichment’s inputs to your columns (for example, map Domain to the company website input), then run it on the rows you want.
Look up HubSpot deals
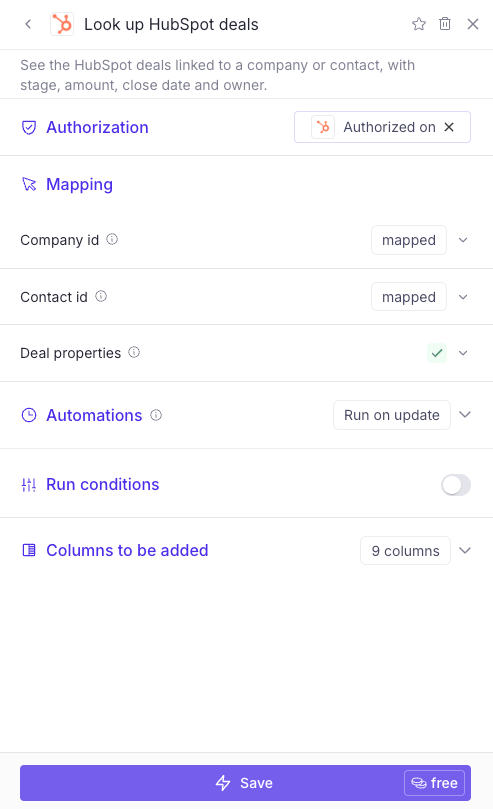
Use Look up HubSpot deals to see which of your companies and contacts are already in your pipeline, for example to keep accounts with an open deal out of new outreach.- In a table of HubSpot companies or contacts, add the Look up HubSpot deals enrichment.
- Map Company id, Contact id, or both. HubSpot imports bring these ids in automatically. With both mapped, you get deals linked to either one.
-
Optional: under Deal properties, pick extra deal properties to return, including custom ones. The standard fields are always included.
-
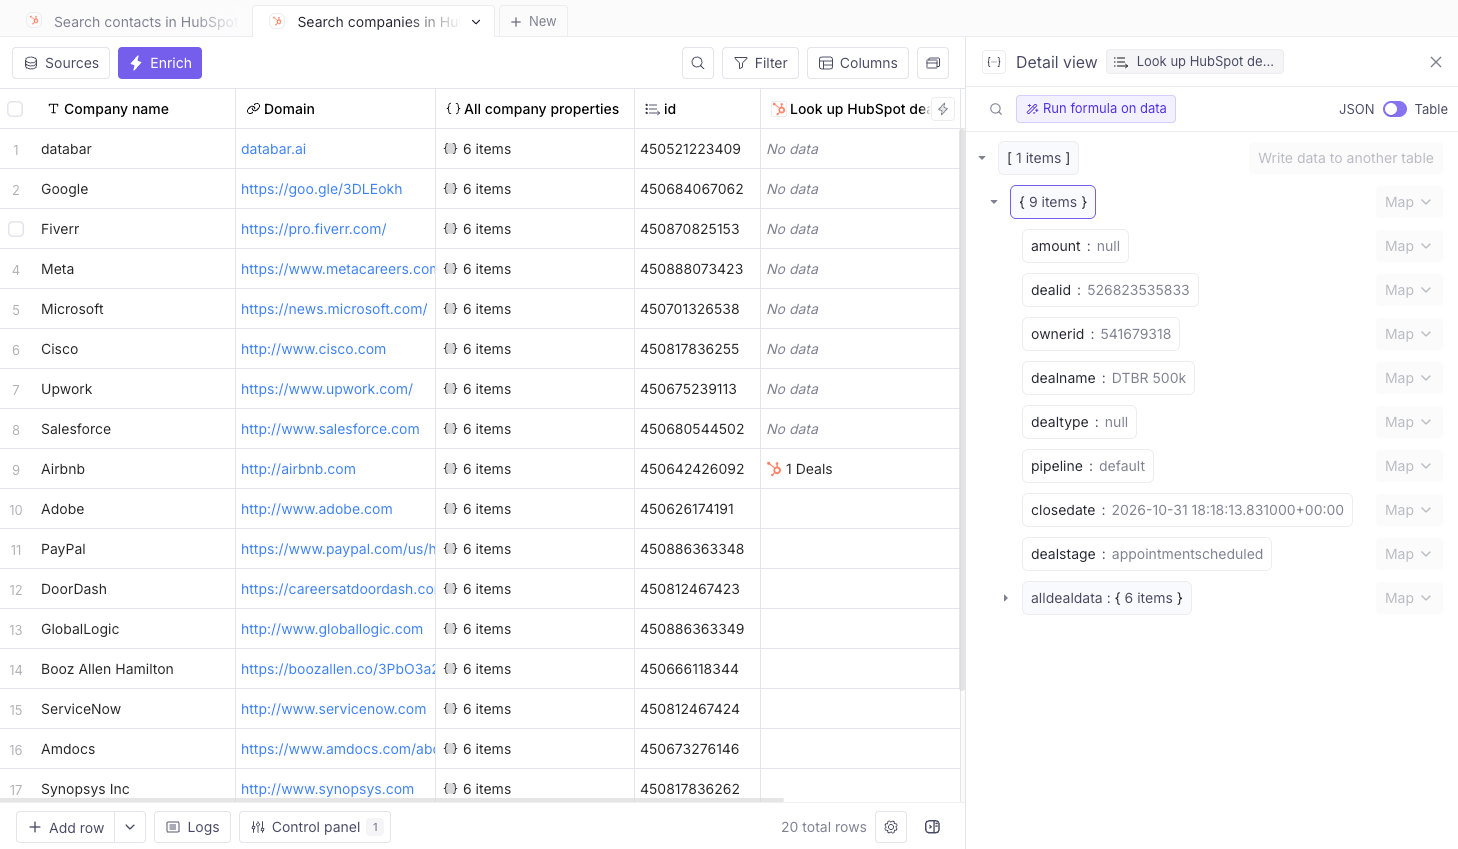
Run it. Each row shows how many deals were found, newest first, up to 100. Open a result to see each deal’s name, stage, pipeline, amount, close date, owner and deal type.
4. Send enriched data back to HubSpot
- In the table toolbar, click Share and Export.
- Under Stream to your CRM, choose HubSpot, then pick an action:
- Create or update HubSpot contacts: updates matching contacts and creates new ones when no match is found.
- Create or update HubSpot company records: updates matching companies and creates new ones when no match is found.
- Map your Databar columns to HubSpot properties. Only the fields you map are written.
- Run the export. The updated records appear in HubSpot within a few seconds.
Disconnect HubSpot from Databar
- Open any table that uses a HubSpot import, and find Authorization in the left panel.
- Click the x on Authorized on HubSpot, then confirm Remove credentials.
- Databar stops all access to your HubSpot account. Imports, exports and schedules that use HubSpot stop working until you reconnect.
- Data you’ve already imported stays in your Databar tables until you delete it.
- Nothing in HubSpot is changed or deleted.
Uninstall Databar from HubSpot
- In HubSpot, click the settings icon in the top navigation bar.
- In the left sidebar, go to Integrations > Connected apps.
- Find Databar, click Actions > Uninstall, and confirm.
- Databar’s access token is revoked immediately, and Databar can no longer read or write any HubSpot data.
- Records Databar created or updated in HubSpot stay in HubSpot.
- Data already imported into Databar stays in your Databar workspace until you delete it.
Troubleshooting
Error: app hasn't been approved to access the required scopes
Error: app hasn't been approved to access the required scopes
The full message reads: “Authorization failed because this app hasn’t been approved to access the required scopes”.Your HubSpot account uses app approval controls, and Databar’s permissions haven’t been approved yet. Ask a HubSpot Super Admin to approve Databar under Settings > Integrations > Connected apps > Approved apps > Approve apps, or to connect Databar themselves. Then try again.
An import returns no rows
An import returns no rows
Check your search query and filters, and that the connected HubSpot user can see those records.